While the GW Video team provides official and marketing-related videos, there may be instances where you — departments, faculty and staff — need to produce quick videos of your own.
It’s important to follow best practices for production, design and accessibility in order to make sure your videos can be enjoyed by as many people as possible, in a format that is accessible to them. This page provides steps you can follow to produce high-quality videos that meet the university’s accessibility requirements.
- For good quality, record with your iPhone, smartphone or a DSLR if you have one.
- Make sure your phone camera is set to record at the highest quality possible.
- iPhone: Opening the Settings app. Scroll down to “Camera” and click “Record Video.” Then, choose “1080p HD at 30 fps.”
- Android: Open the Camera app, then click “Settings” at the top right corner of your screen. Click “video size” and choose “1920×1080.”
- Check that your phone has enough storage available. Ten minutes of video will use about 3.5 GB of storage.
- On an iPhone, go to Settings > General > About > Available to check your storage space.
- On Android, go to Settings > Device Maintenance (or Device Care) > Storage. This will show you how much storage you have left.
-
If you are reading a script, set it up in a way that works best for you. For example:
- Set your laptop at eye level near your phone/camera and display it on the screen.
- Print out a version that you can read at a distance. (Be sure not to rustle your papers!)
- Use an app that can display your script on your phone screen while you read, such as Scripted Video for iOS or Nano Teleprompter for Android.
- Abundant, natural light is ideal. Morning or late afternoon light is preferred. Find a location near a window where you can stand facing the window. Make sure there are no sources of bright light behind you or directly above you.
- Choose a location with a neutral but visually appealing background. A plain wall or uncluttered bookcase can work well.
- If others are around, ask for their help in minimizing noise while you are recording. Even mild noise, such as an open window or loud air conditioner, can be distracting.
- Make sure your phone is set up horizontally (landscape), not vertically (portrait).
- Record video at eye level, preferably using a tripod or other stand to hold your phone or camera steady in place.
- If you need to clean your camera lens, use a soft brush to remove any dust and a soft cloth, such as a microfiber cloth, to remove smudges.
- Stand or sit up straight and look directly at the camera.
- Frame yourself so you can see from your mid torso to the top of your head, while leaving some space above your head.
- Speak loudly and clearly.
- Do a test run — or two! Try recording at least 10 seconds to test the sound, framing and lighting. Adjust as necessary.
Example
In this example, former president Barack Obama uses video recording best practices.
- He is positioned properly in the frame. You could even be a little further back.
- He is in front of a neutral, but appealing backdrop. While there are items on the shelves, they are not overly cluttered.
- He has natural-looking, non-harsh lighting.
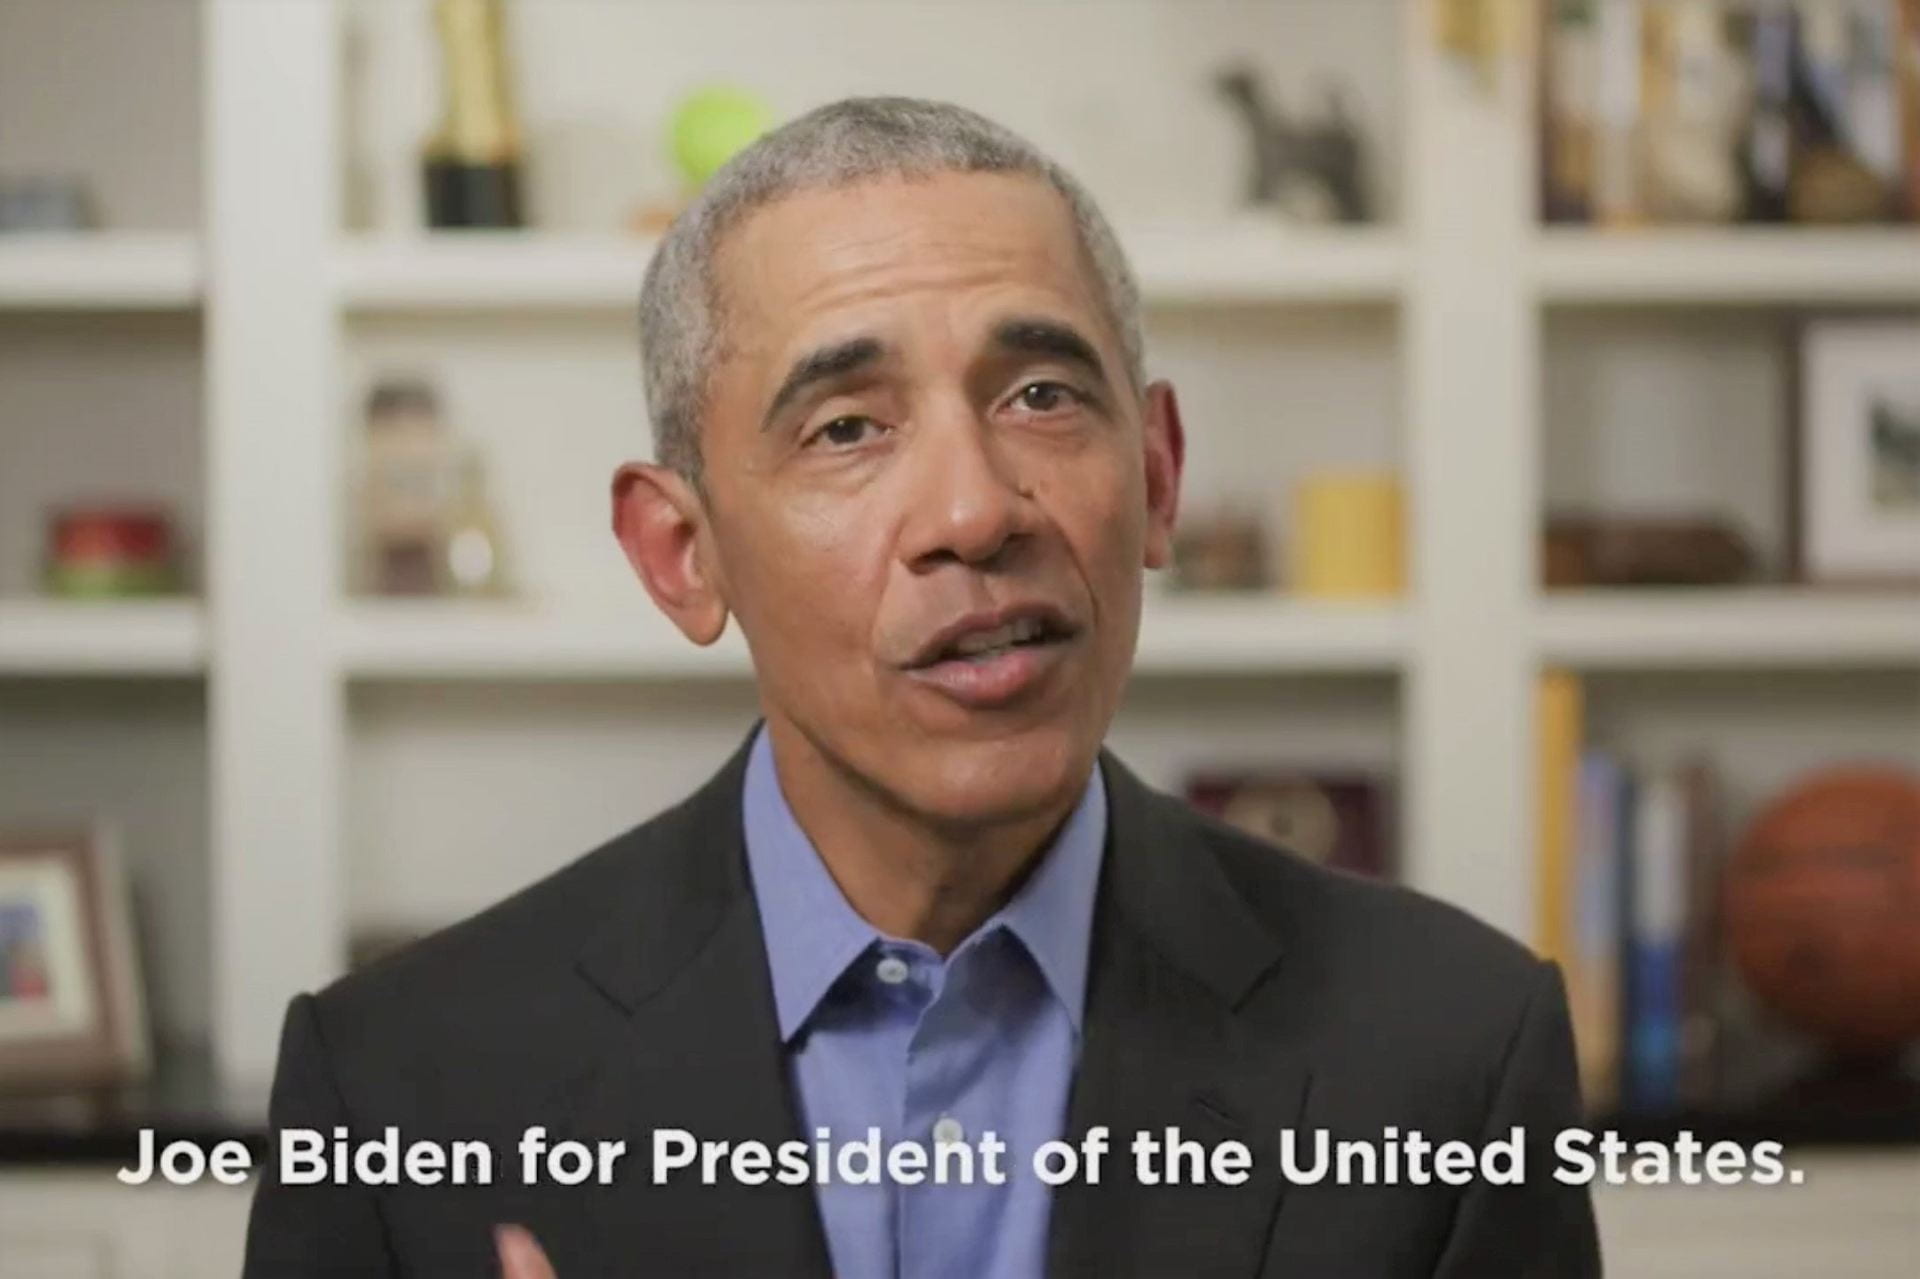
Source: “Obama gives Biden his endorsement. He should really give him his lighting, that set and his camera.“, The Washington Post
Step 2: Edit Your Video
Once you’ve finished your recordings, export the files from your phone into your computer.
- On an iPhone or Android, you can email the file to yourself if you have an email client set up.
- Alternatively, you can transfer the video files directly from your phone into your computer using a connection cable.
- If you’re gathering separate videos from different alumni, staff or professors, make sure you have all of them before you start editing your video.
- We recommend using GW Box to collect and store videos. Once you log into Box, click New/Folder at the top right and label your commencement video folder. Right-click on the folder, and click on “File Request.” This will generate a link where others can upload their videos.
- Once all videos or assets have been uploaded, save all recordings, photographs and music for your video in one folder on your computer for easy access.
Software Options
Some easy video editing software available at no cost, by platform:
- Apple/Mac: iMovie (iMovie tutorial)
- Windows: Microsoft Photos Video Editor (Microsoft Photos tutorial) (learn more about the former Windows Movie Maker)
- Web-based (sign in with your GW NetID): Adobe Spark (Spark tutorial)
- Mobile-based (sign in with your GW NetID): Adobe Premiere Rush (training may be available from LAI multimedia technologists Ben Horn or Joshua Gleason)
All videos should be edited to ensure that people with hearing and visual impairments can receive the necessary information. This means providing captioning and sufficient color contrast in your videos. As with all digital content, videos posted on websites or social media must be in compliance with accessibility laws. Sign language interpretation is welcome, but not required by GW’s web accessibility policy. Sign language is in the WCAG standard at Level AAA, and GW must conform to level AA. Learn more about GW’s digital accessibility policy.
- Once your video has been created, it needs to be captioned. You may choose to caption the video yourself with YouTube automatic captioning or use Rev captioning service for a small fee ($1.25 per video minute).
- Note: Unlike YouTube, Vimeo does not have automatic captioning, so if your video is on Vimeo already, you will need to use an external service like Rev to add captioning.
- YouTube’s captioning is not perfect and will likely require you to make some adjustments to ensure accuracy. YouTube is also blocked in China, so if your students are currently abroad, Vimeo may be the preferred platform.
- Any text slides or graphic text overlays should also meet accessibility color contrast requirements. Use tools such as the WebAIM Color Contrast Checker to confirm whether your color combinations meet accessibility guidelines. (Pro tip: Use the official GW color palette to ensure your video meets branding guidelines. The RGB and 6-digit HEX codes should be used when producing digital content. Not all color combinations meet accessibility requirements — be sure to check before using them!)
Live Stream Videos
For live captioning when we stream video, GW recommends AI Live. AI Live is $180 per hour and can be billed in 15-minute increments. Place the order on their website at least 2 days in advance. If you have additional questions about this service, contact the GW Online Strategy Office at onlinestrategy@gwu.edu.
Spontaneous live streams, such as those you might do “in the moment” for social media, must be captioned within 48 hours. After the live stream is finished, you should be able to save the video to your account. Facebook, like YouTube, can auto-caption videos, but the captions it generates must be closely reviewed for accuracy before they are published.
If your department does not already have a video channel, you will need to sign up for a YouTube channel or a Vimeo channel where you can upload your videos.
Important:
- You will need to use a non-GW Gmail account to create a YouTube channel.
- YouTube is blocked in China, so if your students are currently abroad, Vimeo may be the preferred platform.
- If you use Rev to caption your video or choose Vimeo to host your video, you will need to upload the separate caption file with the video.
